I tried cutting another trivet, like the first project, slightly larger, but had trouble: the bit moved too slowly. It was my fault, a wrong setting, but the bit got hot and then dulled. This is discouraging because that single flute 1/8″ straight bit costs around $13 – not what you’d call disposable.
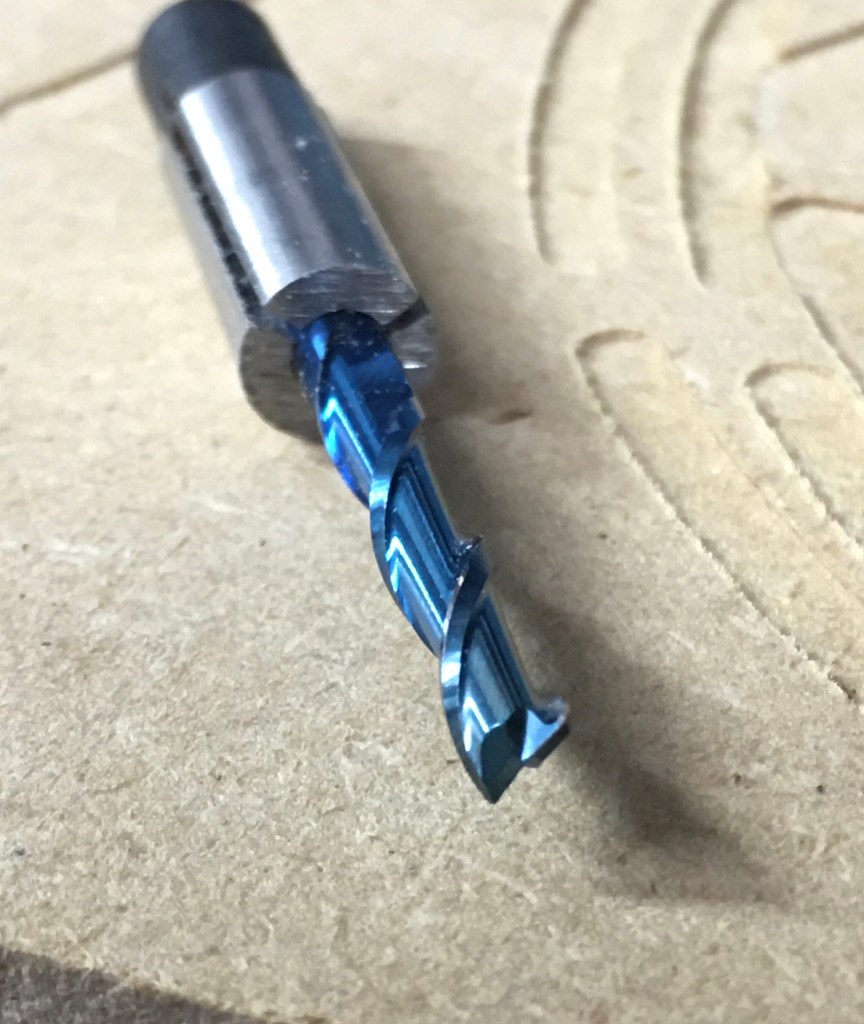
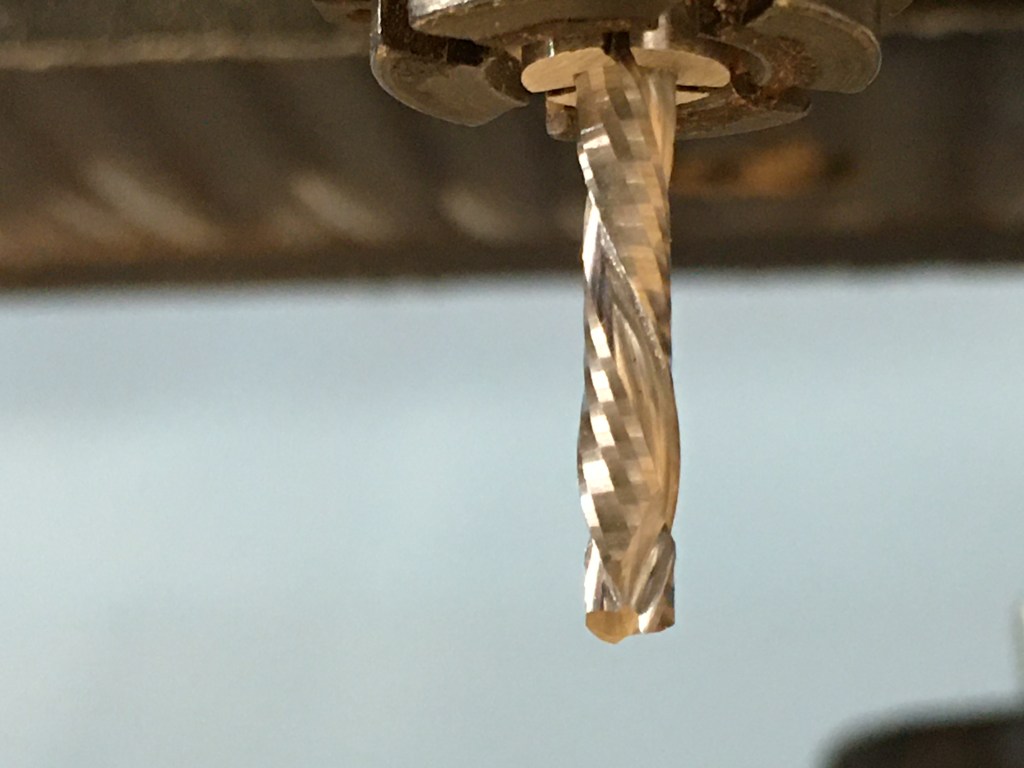
So I tried using 1/8″ spiral upcut bits from Amazon. These are very inexpensive, about $2 each if you buy 10, and I’d heard good things about them. Here’s a photo of one, held in a collet adapter which allows me to to use 1/8″ bits in a standard 1/4″ router.
I like these bits a lot. They are good at clearing out the waste from a cut, but there were some issues.
Tear-out
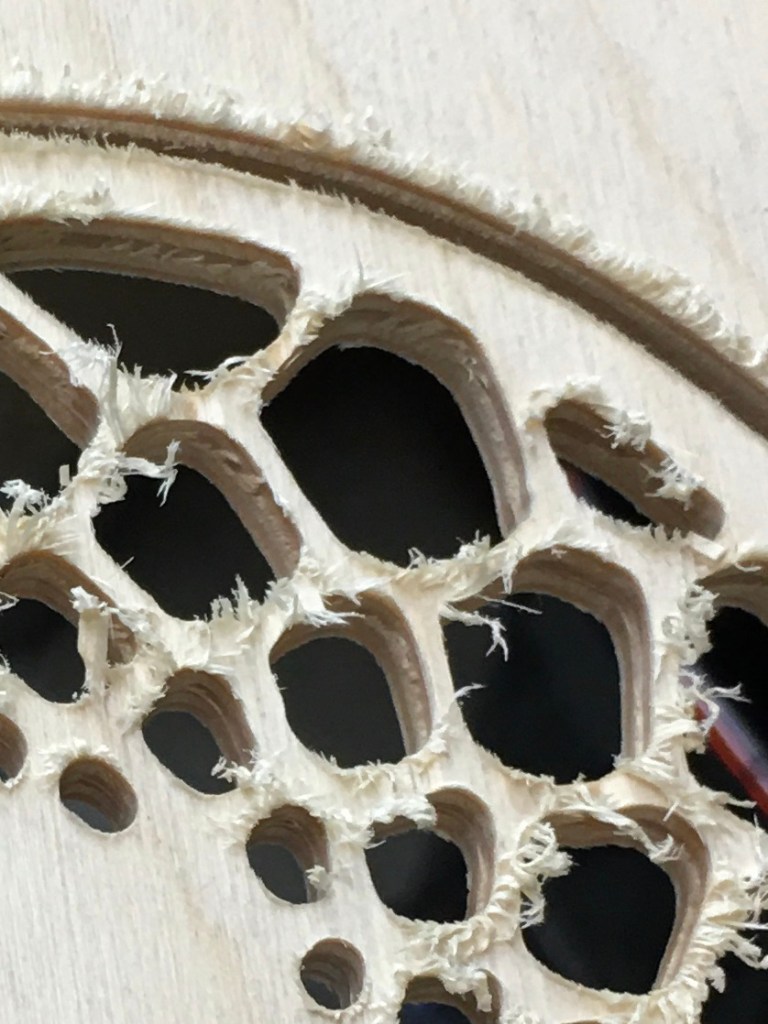
A common problem with up-cut bits, the top layer of wood can be pulled up and sometimes tears. The bottom is cut very cleanly, because of the shearing action of the bit, but the top can tear. This picture shows a particularly bad example. FYI, there also exist ‘down-cut’ bits, which leave the top nice, but then the bottom can look bad (I haven’t tried those yet). The little wisps can be sanded away, but sometimes a piece flies off and there’s nothing to do about that.
Bit flex
This term refers to the bit itself flexing, and/or the entire CNC cutting head being pulled to one side due to the cutting forces.
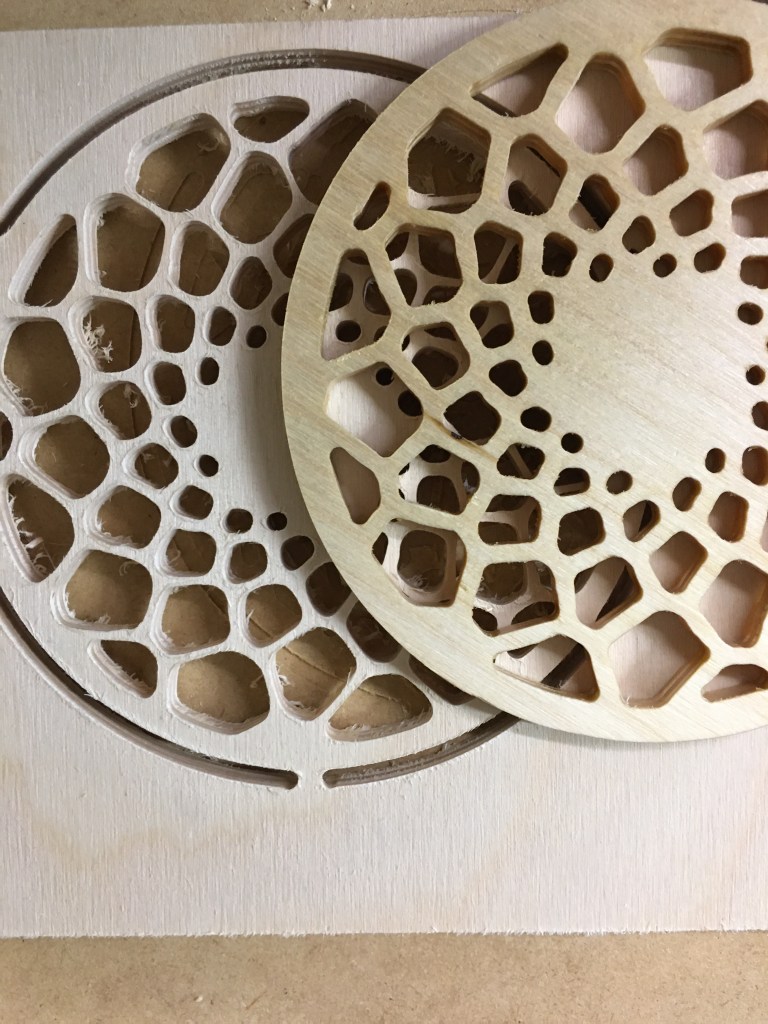
This photo shows two parts made from the same design and cut under the same conditions, except the holes for one were cut in a clockwise fashion and the other counterclockwise. The bit pulls one way or the other based on the direction of motion, and makes the holes either too big or too small. You can see the difference in the width of the wood left between two holes. Excessive cutting speed also contributes to this effect. I was seeing +/- 0.8 mm deviation from the intended line – way too much.
A better bit
Next I tried a compression bit, which is both an up-cut and a down-cut at the same time! Yes, it has a small up-cut section at the end, and the rest is down-cut. This combines the best of both for reducing tear-out. It is called ‘compression’ because the milled material tends to be compressed towards the middle of the bit.
This worked well, producing consistent cuts with no tear-out. Both the top and bottom of the plywood look great! People often do the whole depth of cut in one pass with these bits, but I used two passes. The first pass must be deep enough so the down-cut section is active at the top edge of the wood, which for me was about 3.5 mm.
Pocketing toolpath instead of profile, plus … slower
This design has many small holes. A ‘pocketing’ toolpath will remove all the material from inside the hole, by milling it all away a little at a time. A ‘profile’ toolpath just mills around the edges of the hole, and the inside waste piece of wood pops out along with the sawdust. I eventually started using a pocketing toolpath, starting at the center of the hole and then moving to the outside in a spiral fashion, which works better because the final pass around the inside of the hole removes just a small amount of material, and is therefore more accurate. I also reduced cutting speed somewhat, down to 25 inches per minute.
Results
This was a good combination: compression bit, two passes (first one 3.5 mm), pocketing toolpath (offset, conventional), and 25 ipm. The parts needed some light sanding to remove little wisps and hairs inside some holes, but not much.
Also, I realized I actually like the larger holes with thinner wood between the holes. To me the part looks much better this way. By supplying a negative machining offset in the toolpath calculation, this was easy.
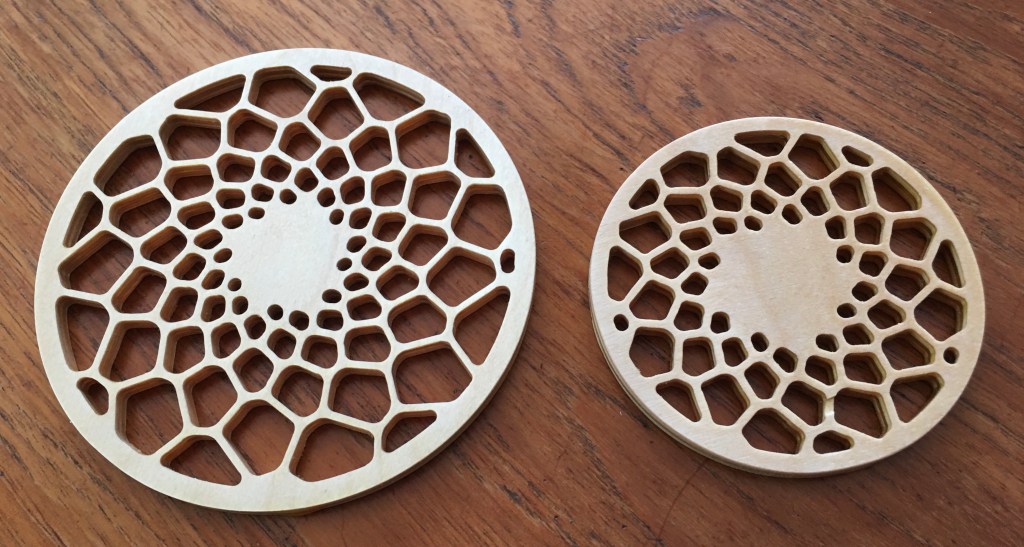
Here’s a picture of my first trivet (the smaller one on the right), and the newer larger trivet. I won’t show the other 5 or 6 failed attempts! A lot of work to create something comparable to my first try, which was beginner’s luck, obviously. But sometimes you move backward in order to eventually move forward.