After updating the VCarve software and configuring it correctly, the goal for the next project is to try out 2-sided 3D carving. The bowl design came from Thingiverse again. Lucky for me, I had an old piece of 8/4 teak handy.
The original design was scaled up by about 20% to fit my block. A 1/4″ straight bit was used for roughing, and 1/4″ roundover bit for the finish cuts, using a spiral cut pattern. Each side of the bowl had a roughing and finishing pass. Tabs are added to the design so that the piece doesn’t break away from the main block as it is cut out.

Alignment is important when doing a 2-sided piece. I used an alignment method recommended by the instructional videos in the VCarve software. Three dowel holes are randomly placed in the waste area of the block. These three holes are cut on the front side of the block before the roughing pass, and then later a reverse (i.e. flipped) copy of the same three holes is cut on the waste board. Dowels are put into the holes when the block is flipped, and these go into the waste board to maintain registration. This method worked for me. The alignment is very good between the two sides (although to be honest, this particular design did not require very exact registration). It’s important that the waste board not move as the workpiece is turned over, so good clamping is important.
After cutting, quite a bit of sanding was needed, partly to remove the tabs and partly to flatten the passes near the top edge of the bowl. I used 80, 100, 150, 220, and 320 grits. (The bottom of the bowl and lower sides came off the machine very smooth, and didn’t require any sanding.) About an hour of hand sanding was needed. Then the piece was cleaned using mineral spirits, and two coats of a tung oil finish product was used.
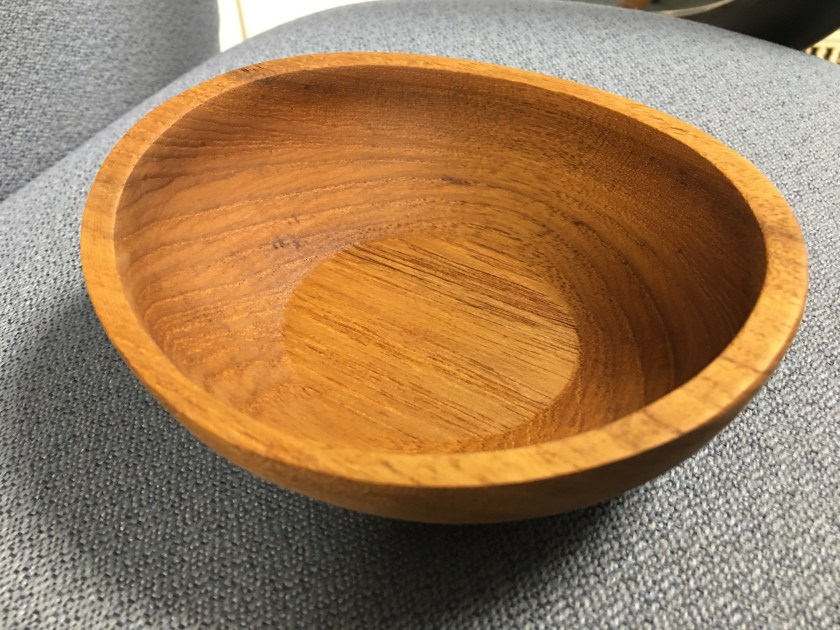
It’s quite beautiful and I’m happy with the results. This is a tough shape to photograph. The design is oval, not circular, and the top edge is scooped, not flat. The bottom of the bowl is very thin – around 2 mm – and feels like it could break with rough handling.
Lessons learned
- In VCarve, use the correct and up-to-date post processor for your machine. This happens during the ‘saving toolpath’ operation.
- Use the ‘contour’ exporter for the finish pass, which allows a bigger tolerance and makes the job to go much faster. A part like this doesn’t need exact dimensions, not like a machined part would.
- But use the ‘arc’ exporter for the dowel holes, which is slower but these need to be as accurate as possible.
- Leave enough room for clamps. I had to abandon the first attempt and start all over again, after I tried to adjust a workpiece clamp that seemed too close to the cutter path. The workpiece moved slightly, and registration was lost. So get the clamps correct from the start.
